クライアント設定ファイルの作成
[1]サンプル設定ファイルのコピー
インストール時にサンプル設定ファイルが下記フォルダに生成されているので、設定ファイル用フォルダにコピーして使用します。今回はクライアント設定なので"client.ovpn"をコピーします。
コピー元
C:\Program Files\OpenVPN\sample-config\client.ovpn
コピー先
C:\Program Files\OpenVPN\config
[2]クライアント設定ファイルの編集
サンプルよりコピーした設定ファイルをメモ帳等のエディタで開きます。変更内容はサーバー設定、DDNS設定に応じた内容にする必要があります。今回は下記条件にて進めます。条件で出てくるファイルは予めサーバーからコピーして"C:\Program Files\OpenVPN\config"に入れておきましょう。
●openVPNサーバーで生成した認証局ファイル名
ca.crt
●openVPNサーバーで生成したクライアント証明書ファイル名
client2.crt
●openVPNサーバーで生成したクライアントKEYファイル名
client2.key
●openVPNサーバーで生成したTLS KEYファイル名
ta.key
●SkyLinkDDNSのホスト名
my-vpn-server
以上の条件でクライアントファイルを編集すると下記のようになります。編集したファイルはclient2.ovpnにリネームします。
# Specify that we are a client and that we
# will be pulling certain config file directives
# from the server.
client

# Use the same setting as you are using on
# the server.
# On most systems, the VPN will not function
# unless you partially or fully disable
# the firewall for the TUN/TAP interface.
;dev tap
dev tun

# Windows needs the TAP-Win32 adapter name
# from the Network Connections panel
# if you have more than one.  On XP SP2,
# you may need to disable the firewall
# for the TAP adapter.
;dev-node MyTap

# Are we connecting to a TCP or
# UDP server?  Use the same setting as
# on the server.
;proto tcp
proto udp

# The hostname/IP and port of the server.
# You can have multiple remote entries
# to load balance between the servers.
remote my-vpn-server.clear-net.jp 1194
;remote my-server-2 1194

# Choose a random host from the remote
# list for load-balancing.  Otherwise
# try hosts in the order specified.
;remote-random

# Keep trying indefinitely to resolve the
# host name of the OpenVPN server.  Very useful
# on machines which are not permanently connected
# to the internet such as laptops.
resolv-retry infinite

# Most clients don't need to bind to
# a specific local port number.
nobind

# Downgrade privileges after initialization (non-Windows only)
;user nobody
;group nobody

# Try to preserve some state across restarts.
persist-key
persist-tun

# If you are connecting through an
# HTTP proxy to reach the actual OpenVPN
# server, put the proxy server/IP and
# port number here.  See the man page
# if your proxy server requires
# authentication.
;http-proxy-retry # retry on connection failures
;http-proxy [proxy server] [proxy port #]

# Wireless networks often produce a lot
# of duplicate packets.  Set this flag
# to silence duplicate packet warnings.
;mute-replay-warnings

# SSL/TLS parms.
# See the server config file for more
# description.  It's best to use
# a separate .crt/.key file pair
# for each client.  A single ca
# file can be used for all clients.
ca ca.crt
cert client2.crt
key client2.key

# Verify server certificate by checking that the
# certificate has the correct key usage set.
# This is an important precaution to protect against
# a potential attack discussed here:
#  http://openvpn.net/howto.html#mitm
#
# To use this feature, you will need to generate
# your server certificates with the keyUsage set to
#   digitalSignature, keyEncipherment
# and the extendedKeyUsage to
#   serverAuth
# EasyRSA can do this for you.
remote-cert-tls server

# If a tls-auth key is used on the server
# then every client must also have the key.
tls-auth ta.key 1

# Select a cryptographic cipher.
# If the cipher option is used on the server
# then you must also specify it here.
# Note that v2.4 client/server will automatically
# negotiate AES-256-GCM in TLS mode.
# See also the data-ciphers option in the manpage
cipher AES-256-CBC

# Enable compression on the VPN link.
# Don't enable this unless it is also
# enabled in the server config file.
comp-lzo

# Set log file verbosity.
verb 3

# Silence repeating messages
;mute 20
[3]必要ファイルが揃っているか確認
"C:\Program Files\OpenVPN\config"に必要なファイルは下記5点です。
・ca.crt
・ta.key
・client2.crt
・client2.key
・client2.ovpn
この内、"ca.crt"、"ta.key"についてはサーバー側の認証局を再設定しない限り、再利用可能です。パスワード等が違う別クライアントの生成を行う場合はサーバー側でその他のファイルを再生成する必要があります。
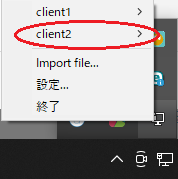
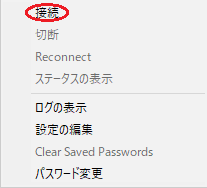
[4]クライアント側でopenVPNを起動し接続する
ここからはサーバーとは別ネットワークにて作業を行います。自宅で確認する場合はスマートフォンのデザリング機能等を使用すればすれば良いです。デスクトップにあるopenVPNショートカット(ない場合は"C:\Program Files\OpenVPN\bin\openvpn-gui.exe")をダブルクリックで起動すると、右下に"OpenVPN GUI"が出現するので右クリックでメニュを出します。"client2.ovpn"ファイルが認識されていればメニュー内に出現するので接続をクリックします。設定ファイルと各種に問題が無ければ接続出来ます。